Make Your Own Gel Nail Cleanser

Who doesn’t like saving money? Paring back on the products you buy saves you money and reduces the things you need to store. So stop paying for products like CND Scrubfresh or Gelish Nail Surface cleanser and make your own gel nail cleanser.

It’s Easy to Make Your Own Gel Nail Cleanser

If you do your own gel polish or gel nails, you probably already have the two key ingredients of gel nail cleanser on hand.

I’ve written about this before: all you need are acetone and isopropyl alcohol (rubbing alcohol) at either 70% or 91%. Mix them 1:1 in a well-ventilated area. If you’re making more than you need for that manicure, store it in a tightly-sealed container, LABEL IT, and stash it in a safe place.

I give mine a shake before using it, then apply to a lint-free cotton wipe to:

  • Prep nails before application
  • Remove the dispersion layer (the tacky/sticky layer) after your final cure

Pricing it Out

When you consider that the average going rate for gel nail cleansers available to consumers is $2.00-2.50 per ounce, it’s easy to see why you might want to make your own gel nail cleanser.

A quick search of the latest prices shows that I can get16oz of acetone for $3 and 16oz of isopropyl alcohol for $3 locally from Wal-Mart. That works out to just $0.38 per ounce if you DIY it. At the high end, that’s an 84% savings!

Even if you need to spend more getting it from Amazon at about $6 for alcohol and $8 for acetone, it works out to $0.88 per ounce, or a 65% savings.

The Bottom Line

Why buy (comparatively) expensive, inexplicably dyed products when you can make your own gel nail cleanser? Whether you want to save more money in general or have more of your nail/hobby budget to go to polishes, there’s little reason not to.

Starch as Non-Aerosol Dry Shampoo

I switched away from conventional, aerosol dry shampoo well-before the news broke that the dry shampoo cans have been spewing poison at an uncomfortable rate. Instead, I use tapioca starch as non-aerosol dry shampoo to minimize oil between washes.

Non-aerosol dry shampoos have been available for a while. However, many of them come in the form of foam that claims to dry quickly. I haven’t tried them personally as they seem impractical; even if they dry fast, damp-looking roots can still be a problem. If I have time for damp hair, I would prefer to wash and dry it quickly.

Instead, on Jean’s advice, I use tapioca starch decanted into a few containers that I apply with a brush or puff. I realize this might sound like lunacy, so here’s more detail on HOW I go about using it:

Read more

Toning my Highlights with WELLA Color Charm Demi Permanent Hair Color

Toning my Highlights with WELLA Color Charm Demi Permanent Hair Color

I haven’t found the courage to color my own hair altogether. I am, however, brave enough to undertake smaller, lower-risk color-adjacent jobs myself. Like glossing, toning my highlights is a perfect example of a low-risk, usually professional procedure I’m willing to undertake myself.

Until last July, I hadn’t explored, “proper,” toners or heard of Wella Color Charm Demi Permanent Hair Color. I’m risk averse, so I had been employing purple toning shampoo to tone down brass with this method.

About five months after my last balayage appointment, I decided to take a stab at toning my highlights properly. After several hours of research, I decided to try toning my highlights with the Wella Color Charm Demi Permanent Hair Color line.

Note: I am not a licensed hair professional; I have not gone to beauty school! I’m a STEM professional and like reading and learning for fun. Although I feel comfortable making these decisions for myself, I recommend you do your homework before taking the plunge into DIY chemical treatments.

Fortunately, Wella Color Charm Demi Permanent Hair Color and other Wella products aren’t all pro-only and any ol’ person can buy from Sally Beauty or Amazon.

Selecting the Correct Toner Shade

First, assess your toning goal. My goal was to cool down the brassiness/warmth that my balayage highlights had accumulated over time. Depending on your hair, you might seek something with neutral or cool/ash tones to achieve this goal.

Read more

Undertaking a DIY Haircut

Undertaking a DIY Haircut

In 2015, when faced with the, “Where do you see yourself in five years?” question, my response would not have included, “pondering or executing a DIY haircut on myself.”

In a normal year* I get my hair cut maybe 4-6 times. Because my hair is long and otherwise well cared-for, it hides my negligence prioritization choices. That said, thanks to the scumbag pandemic making this not a normal year, I have gotten just one haircut this year before shit got real in the US. Normally, by this point in the year I’d have gotten at least two, perhaps three.

For me, this isn’t a catastrophe. As opposed to short styles, long hair can be lower maintenance than you think. Since I’ve been working from home, I’ve been heat styling less. As a result, my hair is in moderately better condition than it would usually be. This isn’t just an act of laziness, but of strategy: I’m on camera for a least half of a given workday. As long as what frames my face looks decent, its fine.

A DIY Haircut

But, regardless, next month will mark six months from my last (professional) haircut. I was getting ready to tone my hair two weeks ago and decided I needed a trim – and I did it myself.

Read more

Clairol Jazzing – Hair Gloss / Hair Glaze Update

Clairol Jazzing Hair Gloss Hair Glaze

Several years ago, I shared a tutorial on how I perform a DIY hair gloss or hair glaze treatment at home. This is one of the blog’s most-popular posts – which is great, but also sad because the damn Clairol Colorgloss Radiance line upon which it was based got discontinued.

I need to create an emoji for how this makes me feel.

Anyway, since the discontinuation, finding an alternative wound up on the back-burner for me. When I started to come up for air, I decided to give another Clariol product a try.

Enter Clairol Jazzing

This time, I went with a single-step (no mixing! no mess!) product that comes in a convenient dispenser bottle. No ratios, no mixer bottles, no matching developer. Clairol Jazzing is under $7 a bottle at Sally Beauty.

Read more

A Sweet Feit Vanity Mirror

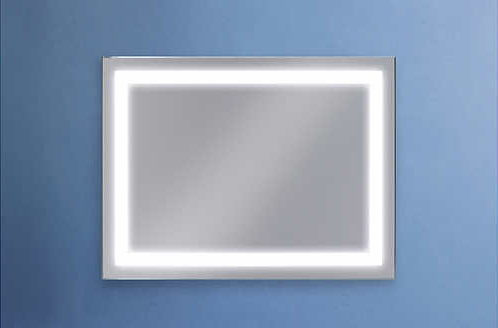
Feit Vanity Mirror

Now that I have space, I get to enjoy the luxury of a vanity. The majority of my setup is simple, and we’ll get into that another time. I’d acquired all of the critical pieces (and, in fact, already owned part of it), but I lacked a mirror. Since I own this Jerdon mirror, it wasn’t a big deal.

But Let’s Talk about Vanity Mirrors

Sure, you can get those retro-looking lit mirrors rimmed with globe-shaped bulbs if you’re into that whole vintage glamour thing. You can also roast in the heat they offput, hoping desperately that your makeup doesn’t start to melt as soon as you apply it.

But why? Those setups can be expensive, then you have the ongoing cost of bulbs to manage, and so forth. (But if that’s the vibe you want, live your best damn life.)

As for me, I don’t put much stock into that; I need functional, not luxurious. And although I didn’t explicitly set a budget for this project, I was inclined to keep the price low since I have a low overall beauty budget for 2018.

Costco to the Rescue

So when I happened across the Feit 24″x32″ LED vanity mirror on a recent trip to Costco (on sale for $50 through 8/31; $80 regular price), you better believe I snatched it up. The Feit mirror can be mounted horizontally or vertically; I chose a horizontal installation for my vanity to give me some flexibility in how I sit when I use it to get ready.

Read more